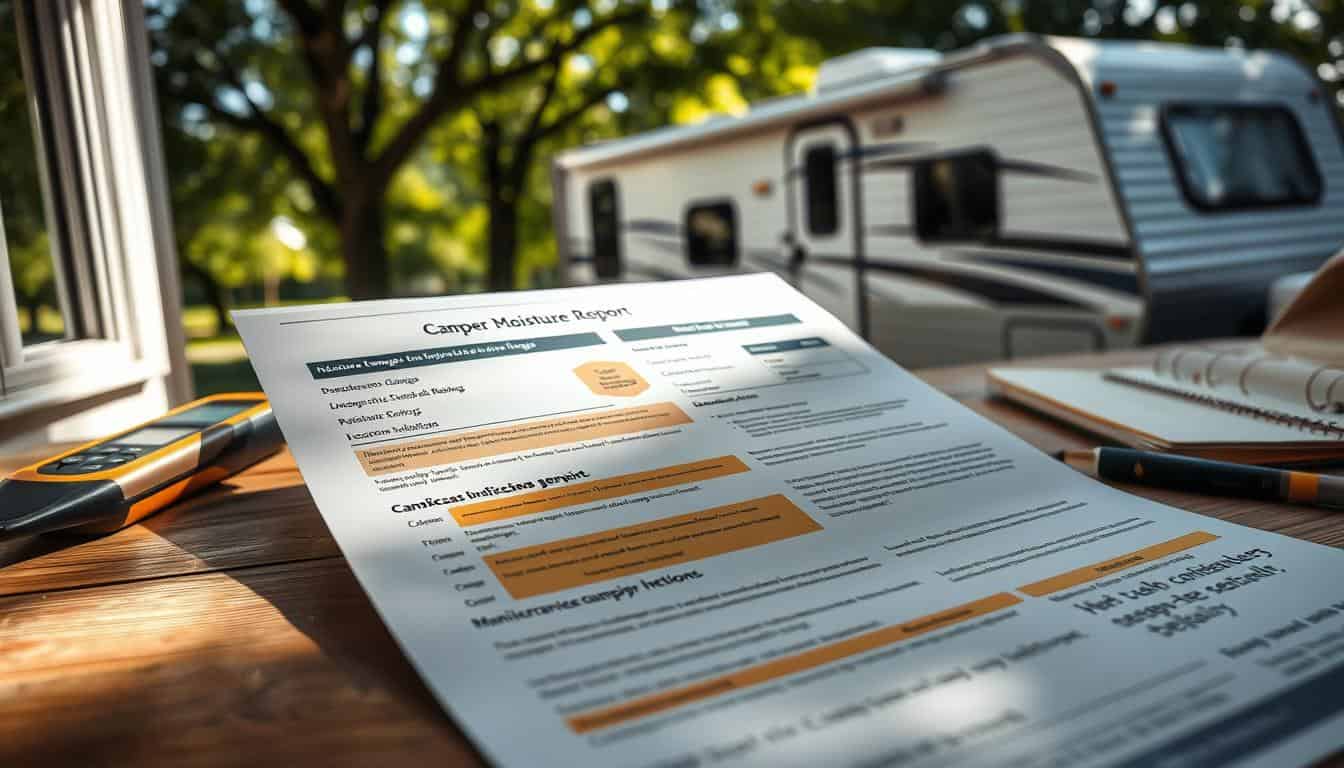
Maintaining the structural integrity of your vehicle is vital for long-term safety on the road. We understand that hidden water intrusion often leads to expensive repairs if left unchecked. By utilizing a professional camper moisture damage report, owners can identify vulnerabilities before they escalate into major failures.
At MOTOEXPERT, we bring over 50 years of expertise in high-end collision and repair services to every inspection. Our team believes that proactive documentation is the best defense against environmental wear. Implementing a consistent camper moisture damage report ensures your investment remains in peak condition for years to come.
We provide these foundational protocols to help German owners navigate complex maintenance requirements with confidence. Trusting in proven industry standards allows you to enjoy your travels without the fear of unexpected structural decay.
Key Takeaways
- Early detection prevents costly structural repairs.
- MOTOEXPERT offers five decades of specialized repair experience.
- Consistent documentation protects your vehicle’s long-term value.
- Professional protocols ensure safety during every journey.
- Regular inspections are essential for maintaining structural integrity.
Understanding Camper Moisture Damage
Understanding the mechanics of moisture is essential for every responsible camper owner. When we ignore the early stages of water intrusion, we risk long-term decay that compromises our living space. Developing a thorough camper moisture damage report helps us track these changes before they become costly repairs.
What is Moisture Damage?
Moisture damage refers to the physical and chemical breakdown of materials caused by prolonged exposure to water or high humidity. Over time, moisture weakens wood framing, corrodes metal components, and encourages the growth of mold within wall cavities. Effective management of these conditions is vital to preserving the structural integrity of our mobile units.
Common Signs of Moisture Issues
We must remain vigilant for specific indicators that suggest our RV moisture control solutions are failing. Common warning signs include soft spots on the floor, peeling wallpaper, or a persistent musty odor inside the cabin. Discoloration on ceilings or walls often points to hidden leaks that require immediate attention.
Causes of Moisture Damage in Campers
Several factors contribute to the accumulation of water within an enclosed camper environment. The most frequent culprit is the failure of exterior seals around windows, roof vents, and slide-outs. Additionally, internal condensation occurs when warm, moist air meets cold surfaces, creating a breeding ground for dampness.
By identifying these root causes early, we can implement better RV moisture control solutions to protect our investment. Maintaining a detailed camper moisture damage report ensures we stay ahead of potential decay. Consistent monitoring remains our best defense against the silent threat of water ingress.
Importance of Regular Inspections
We believe that consistent vigilance is the best defense against hidden water damage. By staying ahead of potential leaks, we protect the structural integrity of our vehicles and ensure they remain safe for every journey. Taking the time to inspect your camper is an investment in its future.
Why Regular Checks Matter
Regular inspections are vital for identifying potential water ingress before it becomes a major structural liability. When we catch small issues early, we avoid the high costs associated with extensive rot or mold remediation. Performing a professional RV water damage assessment allows us to address minor gaps before they escalate into significant problems.
How Often Should We Inspect?
We recommend establishing a routine maintenance schedule that aligns with the changing seasons. It is wise to perform a thorough check before and after long storage periods or extended trips. By keeping a consistent calendar, we ensure that our RV moisture control solutions remain effective throughout the year.
Key Areas to Focus On During Inspections
Certified assessors use the latest tools and methods for thorough inspections, and we should mirror these practices during our own maintenance. Focusing on specific high-risk zones helps us maintain a watertight seal across the entire vehicle. We suggest paying close attention to the following areas:
- Roof seams and vents: These are the most common entry points for water.
- Window and door seals: Check for cracks or gaps in the rubber gaskets.
- Slide-out gaskets: Ensure these remain flexible and properly seated.
- Underbelly and floor edges: Look for signs of discoloration or soft spots.
By systematically reviewing these components, we can maintain peace of mind. Consistent care is the foundation of effective RV moisture control solutions and ensures our campers stay in top condition for years to come.
The Impact of Moisture Damage on Your Camper
When water infiltrates your vehicle, the consequences often extend far beyond simple surface stains. Moisture acts as a silent predator, slowly breaking down the materials that keep your home on wheels safe and comfortable. By performing a consistent RV water damage assessment, we can identify these threats before they escalate into major repair projects.
Structural Integrity Concerns
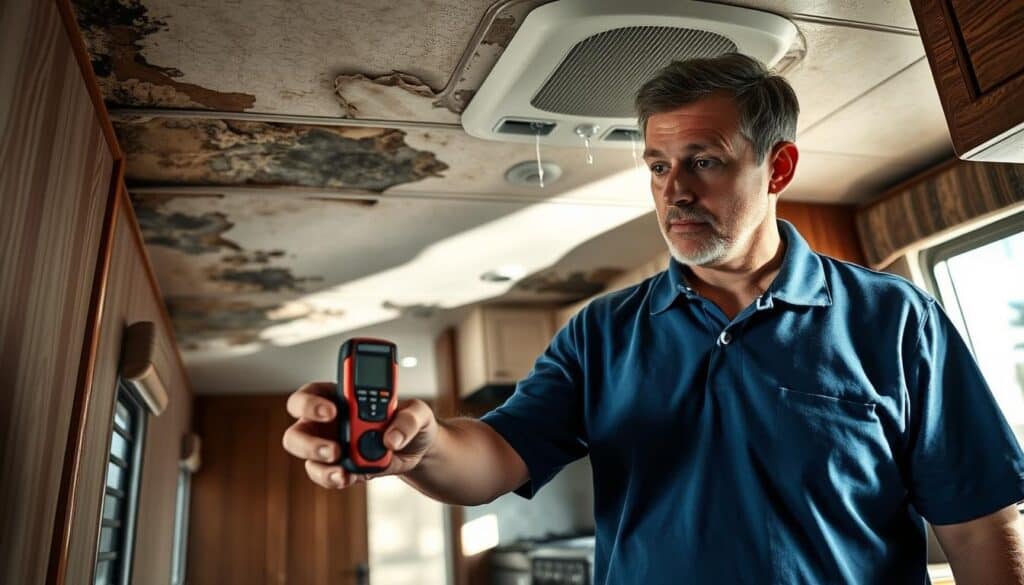
The most alarming effect of moisture is the degradation of the camper’s skeleton. Wood rot can quickly compromise wall studs and floor joists, turning solid timber into soft, spongy material that no longer supports the weight of the structure. Furthermore, moisture often leads to the corrosion of metal framing components.
When these critical elements weaken, the overall safety of the vehicle during travel is put at risk. We must prioritize the following areas to ensure our safety:
- Checking for soft spots in the flooring near entryways.
- Inspecting wall joints for signs of separation or swelling.
- Monitoring the ceiling for sagging, which indicates internal water pooling.
Aesthetic and Functional Issues
Beyond the hidden structural dangers, moisture manifests in ways that are immediately visible and frustrating. Unsightly water stains on ceilings and walls are often the first indicators of a deeper problem. If left untreated, these damp areas become breeding grounds for mold, which poses significant health risks to all occupants.
Functionally, moisture damage can ruin insulation, leading to poor temperature control and increased energy costs. A thorough RV water damage assessment helps us maintain the resale value of our investment by catching these issues early. We should remember that protecting the interior finish is just as important as maintaining the frame for long-term enjoyment.
“Regular maintenance is the most effective way to preserve the structural integrity and aesthetic appeal of your camper over the years.”
Identifying Moisture Levels
Mastering the art of moisture detection allows us to maintain our campers with professional precision. By utilizing the same advanced tools that technicians use to find hidden damage, we can stop water intrusion before it compromises the structural integrity of our vehicles.
Using a Moisture Meter: Our Recommendations
We highly recommend investing in a quality pinless moisture meter for regular maintenance. These devices allow us to scan walls, floors, and ceilings without leaving unsightly holes in the interior finish.
“An ounce of prevention is worth a pound of cure when it comes to water damage in recreational vehicles.”
When selecting a meter, look for models that offer adjustable depth settings. This feature ensures that we are measuring the substrate behind the paneling rather than just the surface moisture of the wallpaper or laminate.
Visual Inspection Techniques
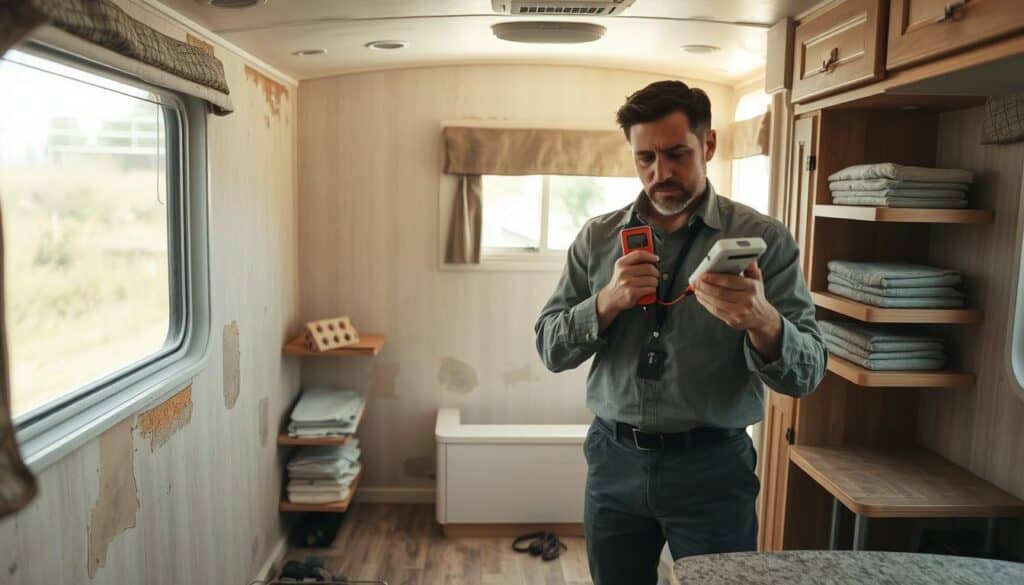
While tools are essential, our eyes remain our most valuable asset during a thorough trailer mold inspection. We must look for subtle clues such as bubbling wallpaper, soft spots in the flooring, or a persistent musty odor that lingers even after airing out the cabin.
Pay close attention to the corners where walls meet the ceiling or floor. These areas are often the first to show signs of water wicking. If we notice any discoloration or staining, it is time to investigate further with our diagnostic equipment.
Understanding Measurement Readings
Interpreting the data from our moisture meter is a skill that improves with practice. Most devices provide a digital readout that correlates to the percentage of moisture content in the material.
- 0-12%: Generally considered dry and safe.
- 13-17%: Indicates potential dampness; monitor closely.
- 18% and above: High risk of rot and trailer mold inspection requirements.
When readings consistently hit the high range, we must act quickly to identify the source of the leak. Understanding these thresholds empowers us to make informed decisions about when to perform minor maintenance or when to seek professional assistance to prevent further degradation.
Preparing a Comprehensive Damage Report
A well-structured damage report serves as the foundation for successful insurance claims and effective repairs. When we take the time to record our findings, we ensure that every trailer mold inspection is handled with the precision required for long-term maintenance. This systematic approach allows us to track the progression of damage and communicate clearly with professional technicians.
Essential Elements of a Moisture Damage Report
To create a report that holds weight with insurance adjusters and repair shops, we must include specific data points. Consistency is vital when we evaluate the health of our vehicle’s interior and exterior surfaces.
- Date and Time: Always record exactly when the inspection occurred.
- Location Details: Note the specific area, such as ceiling corners, floor seams, or window frames.
- Severity Rating: Use a scale from one to five to describe the extent of the visible damage.
- Moisture Readings: Include numerical data gathered from your moisture meter to support your visual observations.
Documenting Findings Effectively
We recommend maintaining a dedicated logbook or a digital folder for all inspection notes. By keeping a chronological record, we can identify patterns in how moisture enters our camper over time. This practice makes every trailer mold inspection much more efficient during seasonal check-ups.
“Documentation is not just about recording problems; it is about creating a roadmap for restoration that saves time and money in the long run.”
When we document our findings, we should be as objective as possible. Avoid vague descriptions and instead focus on measurable facts. This clarity helps technicians understand the scope of work before they even arrive at our location.
Photography Tips for Damage Evidence
High-quality images are essential for proving the extent of water intrusion. When performing a trailer mold inspection, we should use proper lighting to highlight dark corners where moisture often hides. Always include a common object, like a coin or a ruler, in the frame to provide a sense of scale for the damage.
We suggest taking photos from multiple distances to provide context. Start with a wide shot to show the location within the camper, followed by close-up shots of the affected area. Clear, high-resolution images will serve as the best evidence for any future insurance claims or repair discussions.
Identifying Repair Needs
Once we have confirmed the presence of moisture, the next logical step is to determine the best repair strategy. Restoring a camper to its original condition requires a careful assessment of the damage. A professional mobile home humidity evaluation is often the first step in deciding whether we can manage the repairs ourselves or if we need expert assistance.
Common Repair Solutions for Moisture Damage
Most moisture issues start with compromised seals around windows, vents, or roof seams. The most common solution involves removing old, cracked sealant and applying high-quality, weather-resistant alternatives. Ensuring a watertight seal is essential to prevent further degradation of the interior materials.
If the moisture has penetrated deeper, we may need to replace damaged wall panels or insulation. This process often requires removing the affected sections to allow the underlying structure to dry completely. We must be thorough, as leaving damp materials behind can lead to recurring mold growth.
When to Consider Professional Help
Some situations exceed the scope of standard maintenance and require specialized skills. If we discover structural rot in the frame or damage to the electrical system, we should contact a professional immediately. Much like the 24/7 emergency services offered by MOTOEXPERT for accident recovery, knowing when to call in experts can prevent further damage to your vehicle.
Professional technicians have the tools to perform a deep mobile home humidity evaluation that goes beyond surface-level checks. They can identify hidden leaks that might be causing long-term structural harm. Relying on their expertise ensures that the repair is done correctly the first time.
DIY Fixes: What Can We Handle?
We can certainly handle minor repairs if we have the right tools and patience. Simple tasks like replacing loose trim, resealing exterior fixtures, or cleaning surface mold are well within the reach of most owners. These small actions are vital for maintaining the longevity of our campers.
However, we must remain realistic about our limitations. If a repair involves complex carpentry or extensive wiring, it is safer to consult a professional. By balancing our DIY efforts with expert guidance, we keep our campers safe and ready for the road.
Cost Estimates for Repairing Moisture Damage
We often find that owners underestimate the long-term financial impact of moisture damage. By performing a regular mobile home humidity evaluation, you can gain the insights needed to plan your budget effectively. Understanding these costs helps us avoid the shock of sudden, expensive restoration projects.
Factors Influencing Repair Costs
Several variables dictate the final price tag of your repair project. Professional technicians typically look at the following elements when providing a quote:
- Extent of the damage: Small, localized spots are significantly cheaper to fix than widespread rot.
- Material quality: Choosing high-grade sealants and replacement panels increases initial costs but improves longevity.
- Labor intensity: Complex structural repairs require specialized skills and more hours of work.
- Accessibility: Areas that are difficult to reach often require more time for disassembly and reassembly.
Average Costs for Common Repairs
Repair costs vary widely based on the severity of the intrusion. While minor seal replacements might only cost a few hundred dollars, structural work can reach into the thousands. It is vital to obtain detailed breakdowns from your service provider to ensure transparency.
Most professional shops categorize their estimates based on the depth of the repair. Simple surface patches are generally the most affordable, whereas full wall or floor replacements represent the highest tier of investment.
Cost Implications of Ignoring Repairs
Ignoring moisture issues is a risky financial strategy. What starts as a small leak often spreads to structural beams and insulation, leading to exponential cost increases over time.
When you delay repairs, you risk secondary damage like mold growth and electrical shorts. Conducting a consistent mobile home humidity evaluation allows you to catch these problems early, saving you from the high expenses associated with late-stage, comprehensive restoration work.
Preventative Measures to Avoid Future Damage
We believe that preventing moisture issues is far easier than fixing them after they start. By adopting a proactive mindset, we can protect our vehicles from the hidden dangers of water ingress. Much like the high standards maintained by MOTOEXPERT, which utilizes eco-friendly practices such as water-based paints and recycling, we should prioritize sustainable and effective care for our campers.
Effective Sealing Techniques
The integrity of your camper relies heavily on the quality of its seals. Over time, sun exposure and road vibrations can cause sealants to crack or peel. We recommend performing a thorough inspection of all roof seams, window frames, and door gaskets at least twice a year.
When applying new sealant, always choose high-quality, UV-resistant products designed specifically for recreational vehicles. Proper surface preparation is essential for a long-lasting bond. Ensure the area is clean, dry, and free of old residue before applying any new material.
Maintenance Tips for Damp Seasons
Damp seasons pose the greatest threat to our camper’s interior environment. During these months, we must be extra vigilant about ventilation to prevent condensation from accumulating on cold surfaces. Keeping roof vents slightly open, even when the vehicle is in storage, can significantly improve airflow.
“An ounce of prevention is worth a pound of cure when it comes to water damage in mobile living spaces.”
We also suggest checking the exterior for any debris that might trap water against the siding. Leaves and pine needles can hold moisture against seals, accelerating their decay. Regularly clearing these areas helps maintain a dry environment throughout the year.
The Role of Dehumidifiers in Campers
Managing internal humidity is a critical step in preventing mold growth and structural rot. Using a portable dehumidifier can effectively pull excess moisture from the air, especially during humid weather or when the camper is closed up. This simple device acts as a vital safeguard for your interior finishes and upholstery.
If you suspect that moisture is already finding its way inside, it is time to act. Utilizing a professional camper leak detection service provides peace of mind by identifying vulnerabilities before they result in significant damage. Combining regular dehumidification with expert inspections ensures our campers remain safe and dry for every adventure.
Choosing the Right Repair Services
Entrusting your vehicle to the right hands ensures that every repair meets high safety standards. We believe that selecting a qualified technician is a vital step in restoring your camper to its original condition. Whether you require structural bodywork or a specialized camper leak detection service, the quality of the work depends entirely on the expertise of the professional you hire.
What to Look for in a Repair Technician
A truly skilled technician should possess specific training in recreational vehicle maintenance. We look for professionals who understand the unique construction materials used in modern campers. Expertise is not just about fixing a leak; it is about understanding how different systems interact to keep your living space dry and safe.
Assessing Credentials and Reviews
Before committing to a service provider, we recommend verifying their professional background. Check if they hold certifications from recognized industry organizations, as these often indicate a commitment to ongoing education. Furthermore, reading online reviews provides valuable insight into the reliability of a camper leak detection service provider.
Look for consistent feedback regarding their communication style and punctuality. A reputable shop will be transparent about their processes and happy to share examples of their previous work. Trust is built on a foundation of proven results and satisfied customers.
Questions to Ask Before Hiring
Asking the right questions helps you gauge the competence of a potential repair shop. We suggest using the following checklist to ensure you receive the best possible care:
- Do you have specific experience with my camper’s make and model?
- Can you provide a detailed estimate before starting any work?
- What kind of warranty do you offer on your repairs?
- Are your technicians certified to perform specialized moisture mitigation?
- How do you document the progress of the repair for my records?
By taking these steps, you protect your investment and ensure your peace of mind. Professionalism and clear communication are the hallmarks of a service provider you can rely on for years to come.
Conclusion: Ensuring Our Campers Stay Dry and Safe
Keeping your vehicle in peak condition requires a proactive mindset and consistent attention to detail. We view every trip as an opportunity to monitor the health of our mobile homes and ensure they remain safe for the road ahead.
Summary of Essential Practices
A thorough motorhome dampness analysis serves as the foundation for long-term vehicle health. By integrating these checks into our routine, we catch minor issues before they escalate into costly structural repairs.
Commitment to Quality Standards
We look to industry leaders like MOTOEXPERT for guidance on maintaining high standards of care. Their reputation for excellence reminds us that quality maintenance protects our financial investment and our peace of mind during every journey.
Final Thoughts on Long-Term Care
Consistent vigilance remains the best strategy for avoiding moisture damage. We encourage all owners to prioritize regular inspections and professional assessments to keep their campers dry. Embracing these habits ensures our vehicles stay reliable and ready for every new horizon.
FAQ
What exactly is included in a professional camper moisture damage report?
Why should we invest in an RV water damage assessment?
Is a trailer mold inspection necessary if I don’t smell anything?
How does a mobile home humidity evaluation differ from a standard check?
What are the benefits of using a camper leak detection service?
When is the best time to perform a motorhome dampness analysis?
What are the most effective RV moisture control solutions?
Likwidacja szkody: samodzielnie czy z MOTOEXPERT?
Porównaj, zanim ubezpieczyciel zdecyduje za Ciebie.
| ✗ Samodzielnie (kalkulator / AI ubezpieczyciela) | ✓ Z MOTOEXPERT + rekomendowany Adwokat |
|---|---|
| Wycena rzeczoznawcy ubezpieczyciela — interes płatnika, ryzyko zaniżenia | Niezależna certyfikowana opinia techniczna — pełny kosztorys wg stawek rynkowych |
| Pominięte pozycje: utrata wartości, auto zastępcze, holowanie | Komplet roszczeń: utrata wartości pojazdu, auto zastępcze, koszty dodatkowe |
| Samotne negocjacje z ubezpieczycielem, bariera językowa | Obsługa po polsku + rekomendowany Fachanwalt für Verkehrsrecht do reprezentacji prawnej |
| Sztuczna inteligencja nie stanie za Tobą w sądzie — koszt błędu ponosisz Ty | Szkoda z OC sprawcy w Niemczech przy jednoznacznej odpowiedzialności: uzasadnione koszty rzeczoznawcy co do zasady pokrywa ubezpieczyciel sprawcy (§ 249 BGB) |